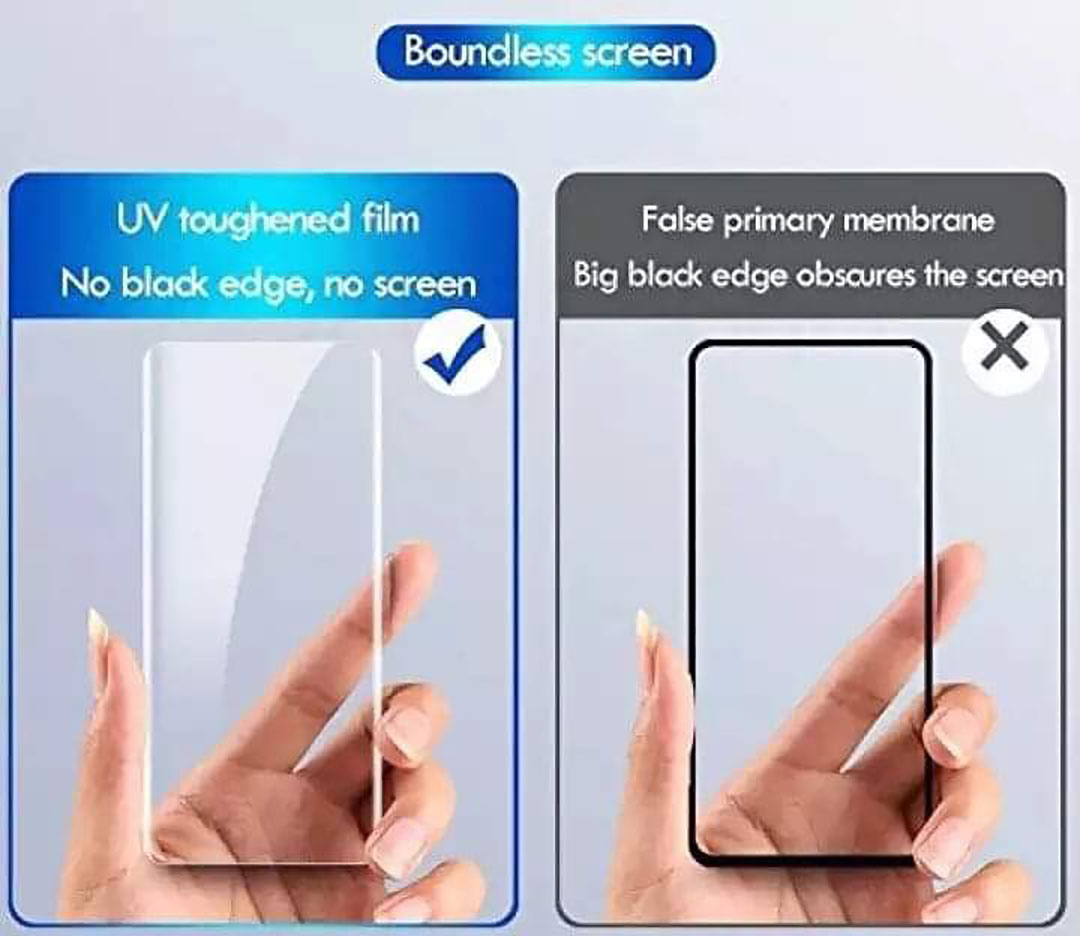
- UV curved glass screen protector designed for full coverage
- Advanced border-less design for smooth touch experience
- High transparency maintains original screen clarity
- Strong adhesion with easy installation kit included
- Scratch and impact resistant for daily protection
For Infinix Hot 60 Pro Plus - AK Mossily UV Curved Glass - Advanced Border Less Screen Protector With Easy Installation Kit
Brand: No Brand
৳ 200৳ 500-60%
In Stock
SKU: CU-1772538-3067159
Category : Screen Protectors
Specifications
Product Details
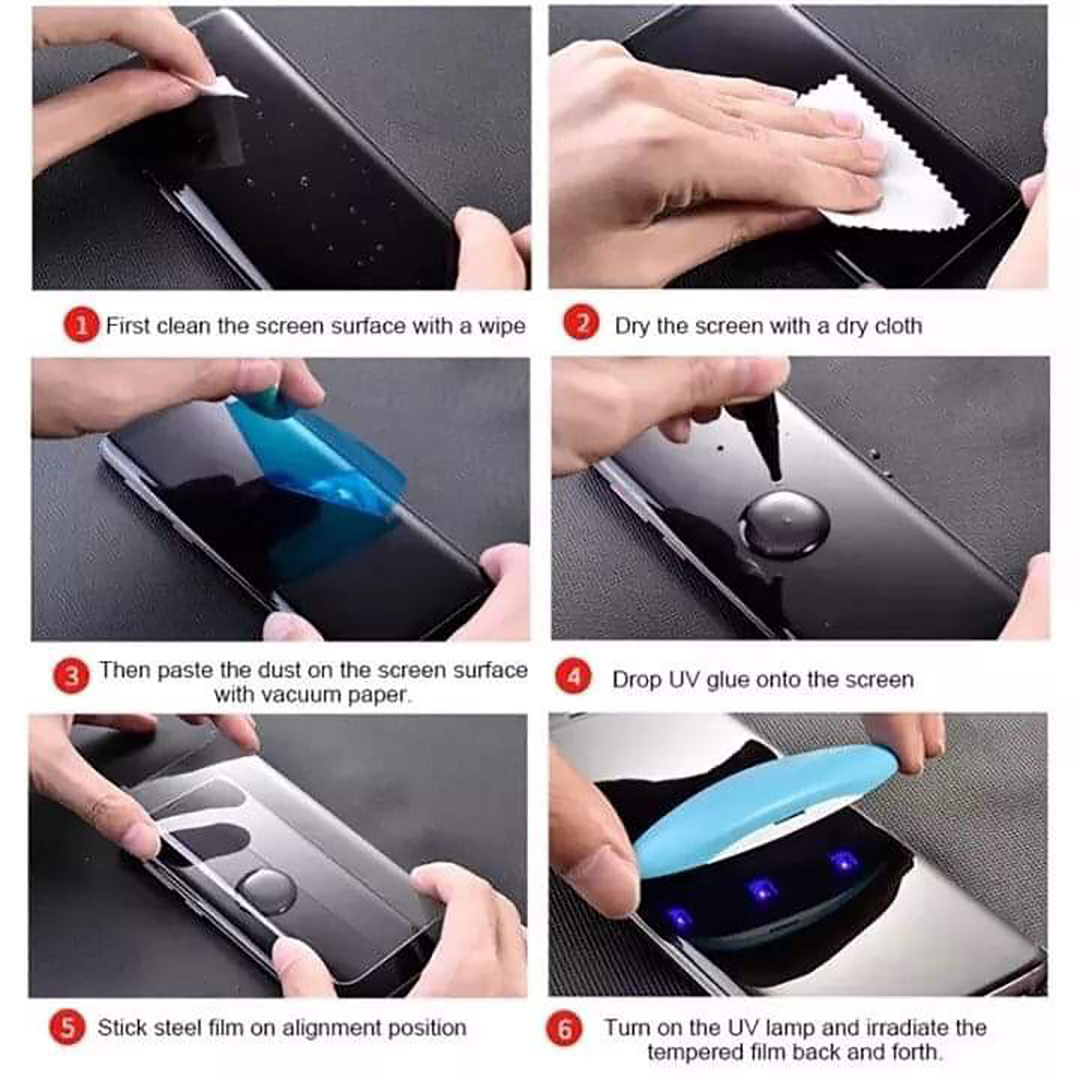
UV Glue Curved Screen Protector Installation Guide
- Prepare Your Workspace
- Choose a clean, dust-free environment to ensure flawless installation.
- Gather the installation kit, which typically includes the tempered glass screen protector, UV glue, a UV light, wet wipes, a dry cloth, and dust removal stickers.
- Clean Your Device’s Screen
- Use the provided wet wipe to remove any smudges, fingerprints, and dirt.
- Follow up with the dry cloth to make the screen completely dry.
- Use dust removal stickers to catch any remaining dust particles.
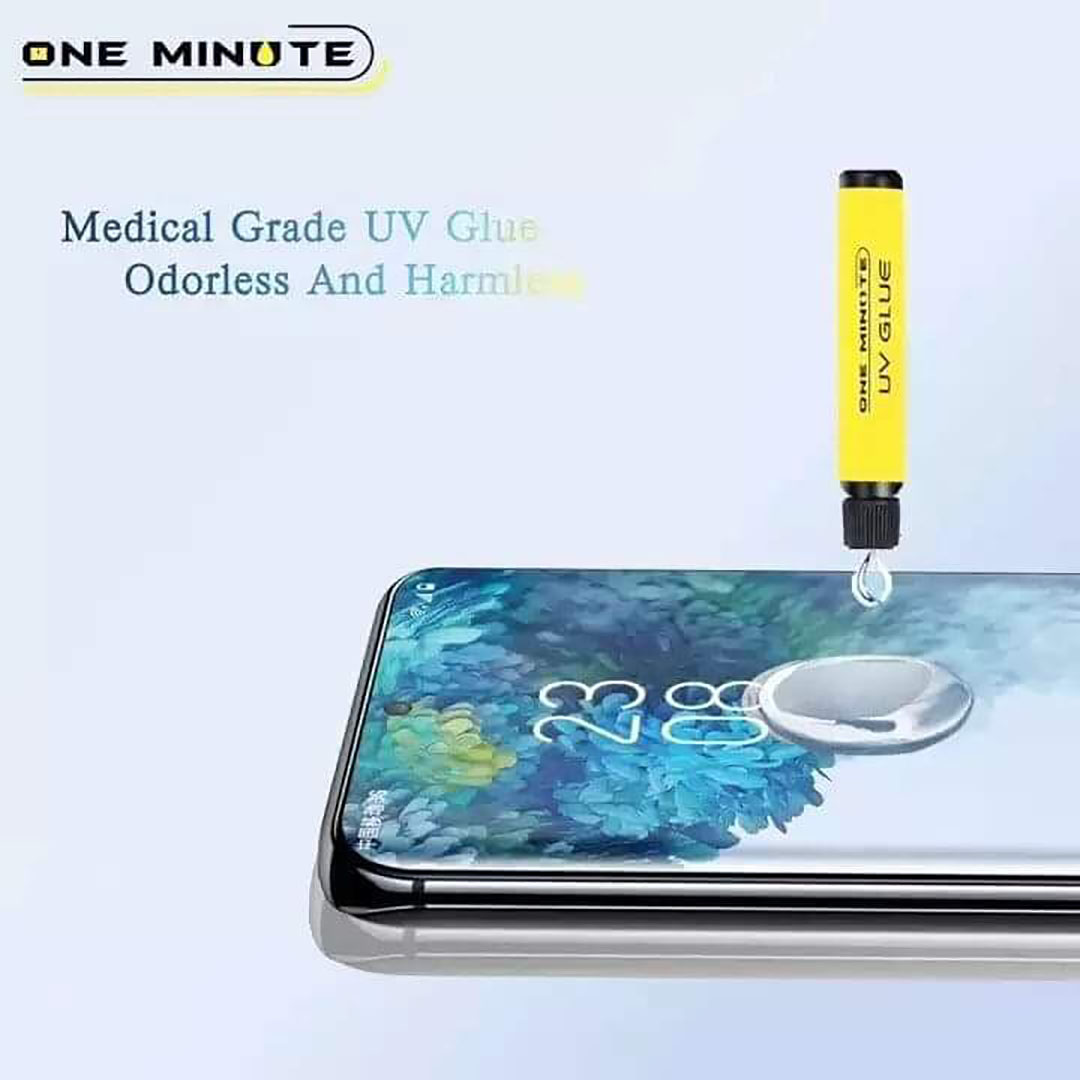
- Apply the UV Glue
- Remove the cap from the UV glue tube.
- Gently squeeze an even bead of glue onto the center of your device's screen.
- Position the Screen Protector
- Carefully align the curved screen protector with your device’s screen.
- Lower it slowly onto the screen, ensuring that the glue spreads uniformly across the surface.
- Let the Glue Settle
- Allow the glue to naturally spread and fill any gaps between the screen and the protector.
- You can lightly press the edges of the protector to help eliminate air bubbles.
- Cure the Glue with UV Light
- Use the provided UV light to cure the glue.
- Turn on the UV light and move it evenly across the screen protector for about 1–2 minutes.
- Final Touches
- Check for any remaining air bubbles; use a soft cloth to gently push them toward the edges.
- Wipe off any excess glue from the edges of the screen protector.
- Test and Enjoy
- Ensure the touch sensitivity and clarity of your screen.
- Your screen is now protected and ready for use!
Delivery
Inside Dhaka
Standard delivery
Free
Service
7 Days Returns
Change of mind is not applicable as a Return Reason. To learn more, please check Return Policy
No Warranty
Ratings & Reviews of For Infinix Hot 60 Pro Plus - AK Mossily UV Curved Glass - Advanced Border Less Screen Protector With Easy Installation Kit
Rahman Regnum Centre, Level-6, 191/1, Tejgaon C/A, Dhaka-1208, Bangladesh
9 am - 9 pm (Everyday)
Follow us on
Customer Care
Payment Methods

© Copyright 2026 Cartup All Rights are Reserved.