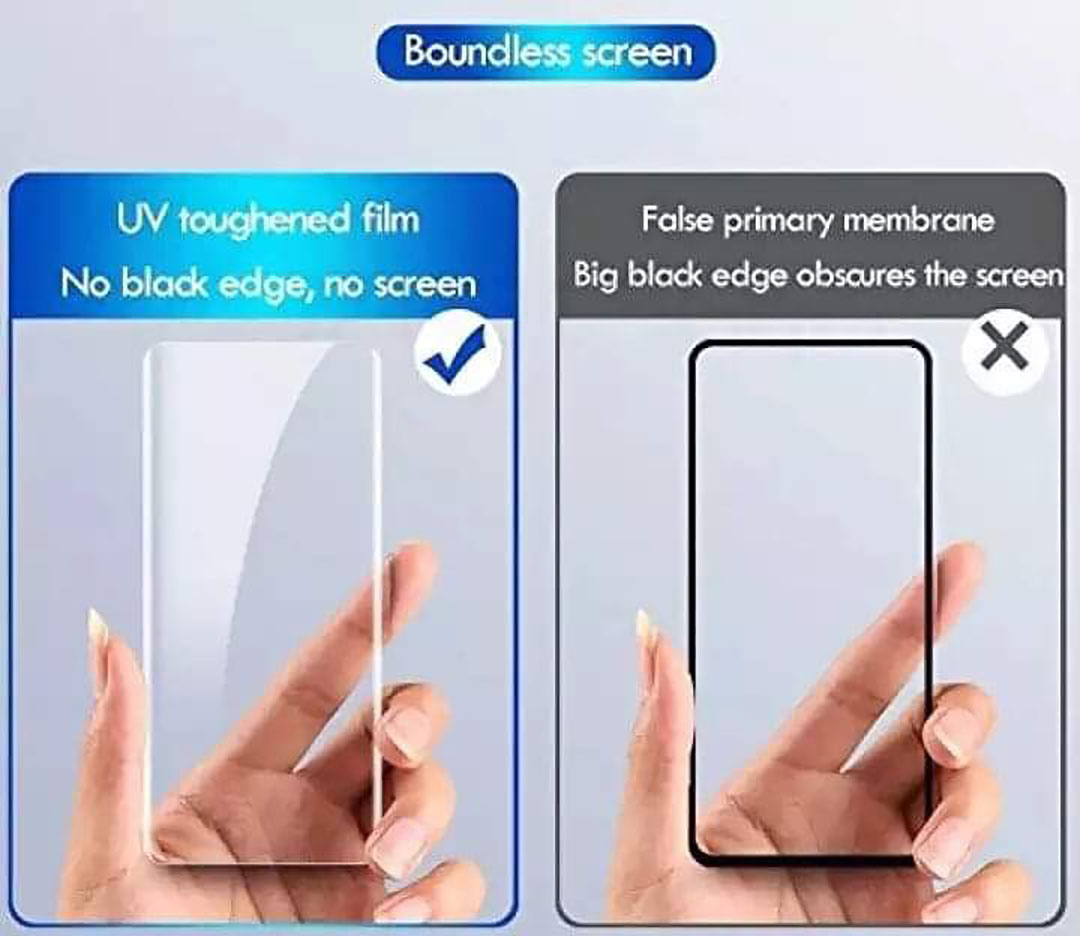
- High-clarity screen protection for everyday use
- Helps guard against scratches, dust, and minor impacts
- Smooth touch response for comfortable scrolling
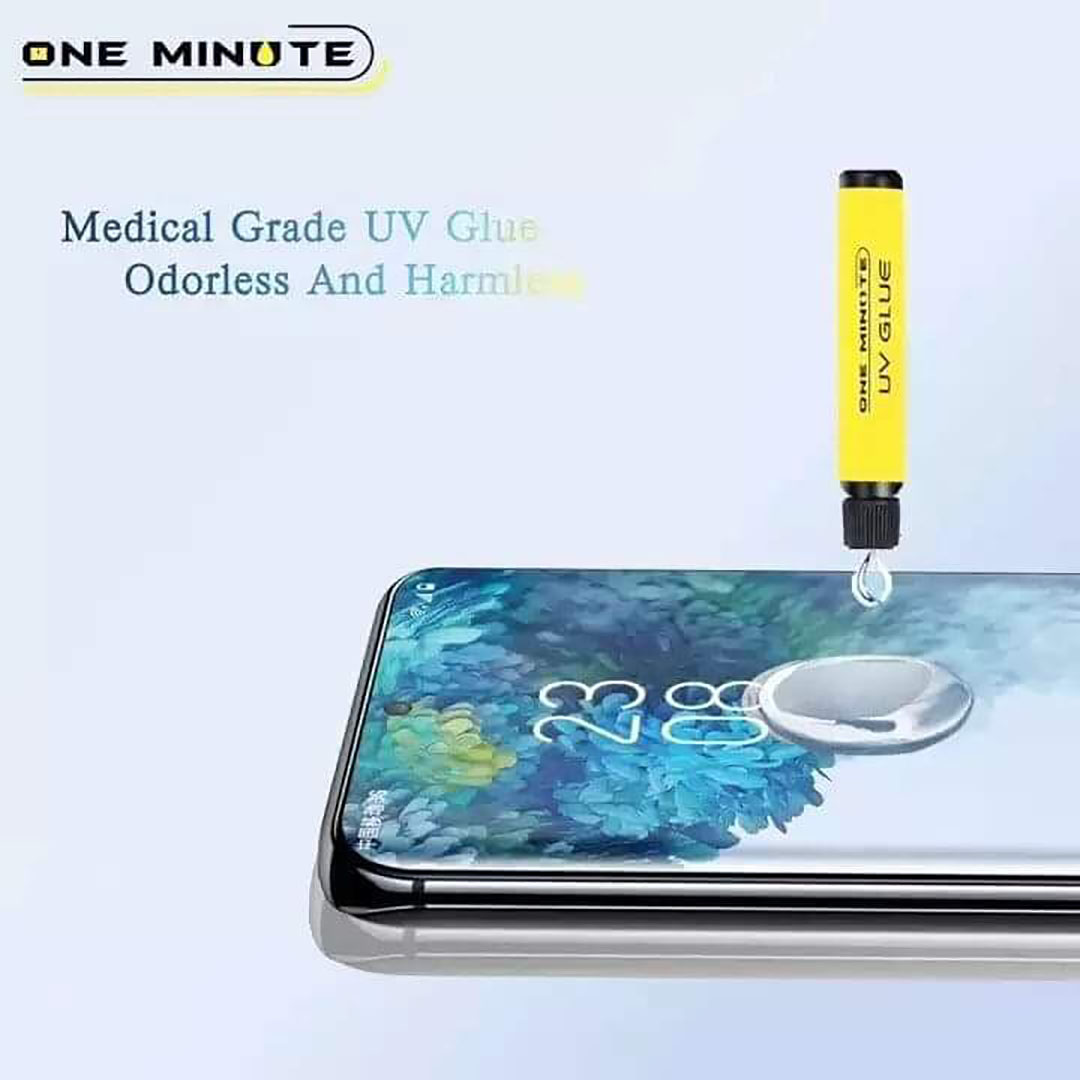
- UV/adhesive installation support for a stronger, clearer fit (where applicable)
- Curved-screen coverage designed to match the display shape
- Designed for a precise fit for the listed phone model
UV Glue Curved Screen Protector Installation Guide
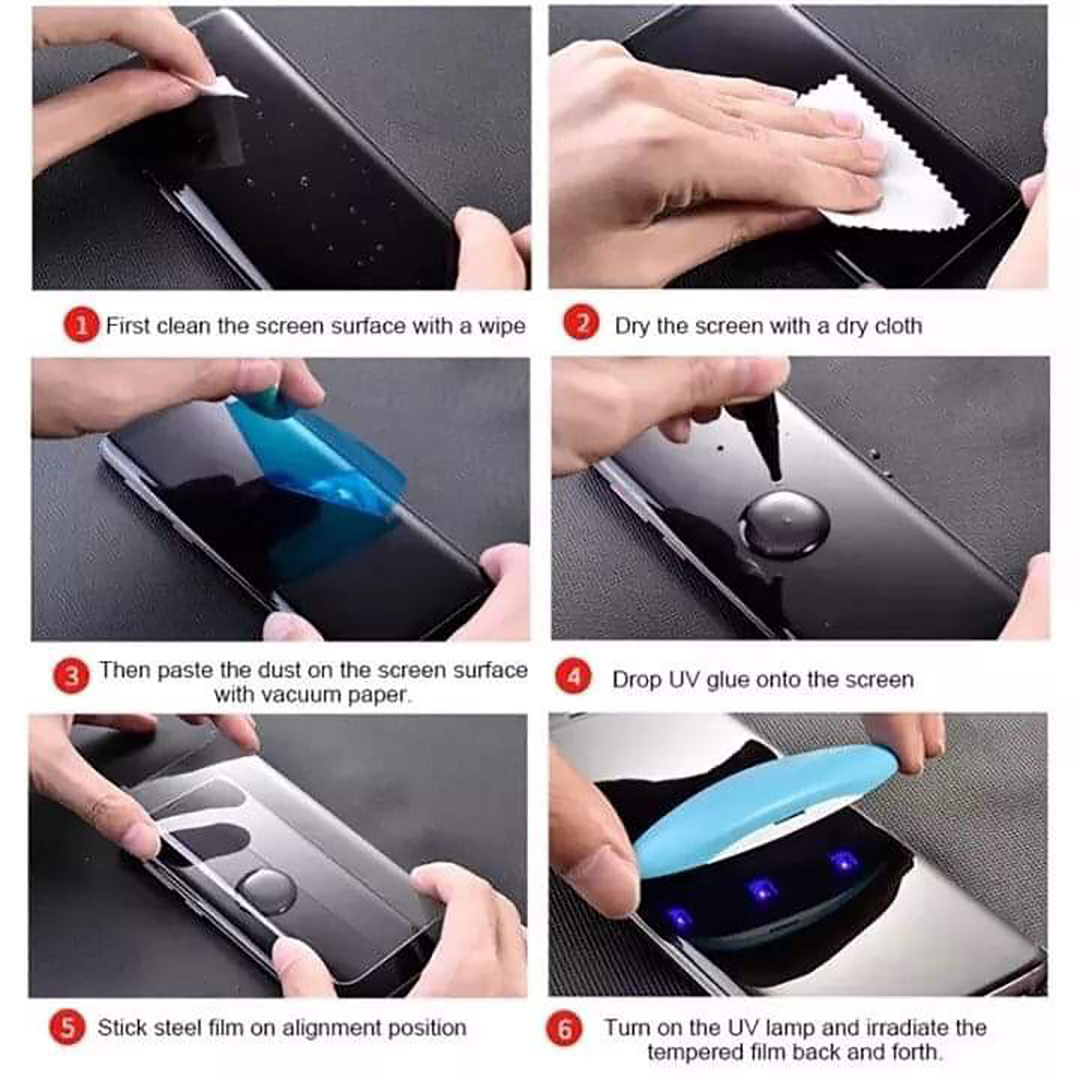
- Prepare Your Workspace
- Choose a clean, dust-free environment to ensure flawless installation.
- Gather the installation kit, which typically includes the tempered glass screen protector, UV glue, a UV light, wet wipes, a dry cloth, and dust removal stickers.
- Clean Your Device’s Screen
- Use the provided wet wipe to remove any smudges, fingerprints, and dirt.
- Follow up with the dry cloth to make the screen completely dry.
- Use dust removal stickers to catch any remaining dust particles.
- Apply the UV Glue
- Remove the cap from the UV glue tube.
- Gently squeeze an even bead of glue onto the center of your device's screen.
- Position the Screen Protector
- Carefully align the curved screen protector with your device’s screen.
- Lower it slowly onto the screen, ensuring that the glue spreads uniformly across the surface.
- Let the Glue Settle
- Allow the glue to naturally spread and fill any gaps between the screen and the protector.
- You can lightly press the edges of the protector to help eliminate air bubbles.
- Cure the Glue with UV Light
- Use the provided UV light to cure the glue.
- Turn on the UV light and move it evenly across the screen protector for about 1–2 minutes.
- Final Touches
- Check for any remaining air bubbles; use a soft cloth to gently push them toward the edges.
- Wipe off any excess glue from the edges of the screen protector.
- Test and Enjoy
- Ensure the touch sensitivity and clarity of your screen.
- Your screen is now protected and ready for use!